Who am I kidding to post DIY tutorials when I know that nobody visits my blog? Anyway, I wanna share something very useful for amateurs dabbing onto party crafts materials. Yes, yours sincerely.
My 21st birthday party is coming up next Saturday and I havr started planning the decorations a month before. I know right... so kiasu. The most important decoration in a party is the birthday banner. So I decided to drop by the two shops along Middle Road that sells party decorations. Guess what? They are horrid!!! *bloodcurdling scream* The designs are either for 12 and below or baby showers or wedding anniversaries. The only decent ones were in pastel colours and silver but the words are "IT'S A BOY/GIRL!" or "HAPPY 25TH ANNIVERSARY". I decided to give up and invest more money on a prettier banner through DIY.
STEP 1. Buy scrapbook papers (12" x 12") of a light background that can be compatible with black or greyish black ink. The colours can be yellow beige, light blue or any light shade of the colour of your birthday theme. I chose yellow for the banner to go along with black fonts.
Depending on the length of your banner - I go by each alphabet - buy one paper for every 4 alphabets. My banner is "HAPPY 21ST BIRTHDAY" so I bought 4 pieces with the "st" representing one alphabet.
Note: Inkjet printers are unable to print WHITE INK. I heard it's a great challenge for most printers and can only be done by really expensive ones. Unless you have a coloured background and place white fonts over it - the printer will regard it as an empty space.
STEP 2. Get ready a pair of scissors that can handle the thickness of scrapbook paper. Wait... Do you have a box of set squares back in secondary school? If yes, you are (damn) lucky because there is no need to buy an 3 inch circular craft punch! Use the item that you use to draw arcs back in school days.
STEP 3. If you have a packet of photo paper lying around (4" x 6"), pick one out as your template. The packet should state the photo paper dimensions. Trace out the template on the side of the scrapbook paper you wish to use so it can guide you during cutting. My arrangement is two vertical rectangles side by side starting from the upper left corner; one horizontal rectangle at bottom right corner and one vertical drawn right beside it. You should be able to draw 4 rectangles per paper.
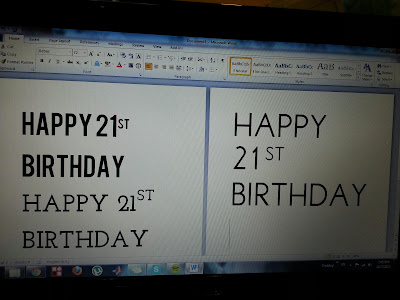
STEP 4. Cut out all rectangles and leave them aside. Choose the font you want and play around in Microsoft Word to see how they look like.
 |
| Fonts used: Bebas, Josefin Slab, Libby |
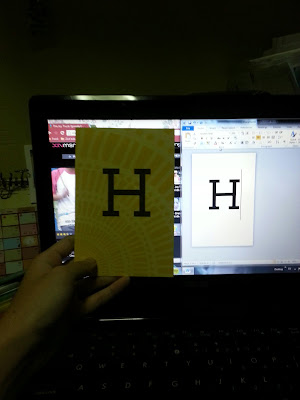
Once you have finalized, select Print > 4" x 6". Go back to Home and you should see that the document size had changed. Using one page only, type the first letter of your alphabet and enlarge the font such that it is centralized. This is a test run so you can use the photo paper (previously used as a template) to print out a sample.
 |
| Centre alignment with font size 200 using Josefin Slab |
STEP 5. Once the photo is done, use the sharp part of the set square item to anchor at the middle of the alphabet. Adjust the gap between your anchor and pencil and see if a perfect circle can be drawn within the paper.
Don't worry if you can't see it because the pencil doesn't work on glossy photo paper but works on normal paper.
Remember NOT to adjust the gap anymore as you will need it for many many more alphabets.
If the font is too big or a perfect circle cannot be drawn, go back and adjust and reload a new photo paper or any 4" x 6" paper as your sample.
STEP 6. PRINT OUT EVERY ALPHABET! Draw circles - the line should be drawn dark enough for you to cut - on each alphabet after locating the centre point. Cut out everything and tie them up together by glueing with ribbon or garden twine!
STEP 7 (optional). If you would like a fancy banner, use some fabric tape or crotchet or lace tapes and go over the sides.
P/S: If the ink appear light, fill them in with black marker but be very careful not to fill over.
Good luck! :)


No comments:
Post a Comment